Dec 17, 2015
At the end of October, my husband and I decided to do a 21 day cleanse. We didn’t follow any mainstream cleanses in which they try to sell product (I am not a fan), but we basically followed the principles set by Dr. Alejandro Junger and his Clean Gut Cleanse & his blog for a bunch of recipes. Basics of it, were a protein smoothie for breakfast, lunch was main meal of veggies, protein and clean fat and then dinner was an entree salad + plus no eating from dinner until breakfast. My husband and I loved it, and now we crave our morning smoothies instead of a heavier breakfast. I thought I would share my favorite smoothie combination that I would pick over any others.
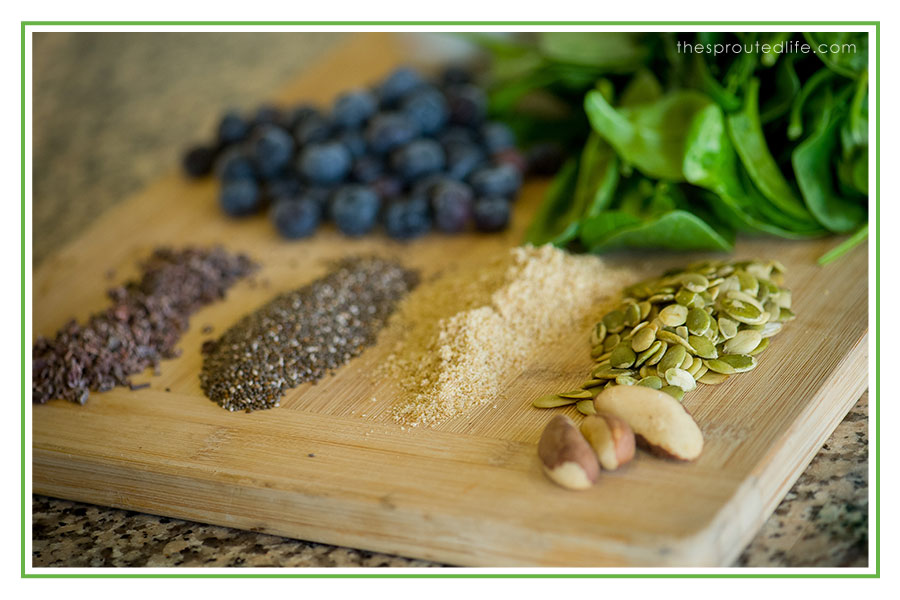
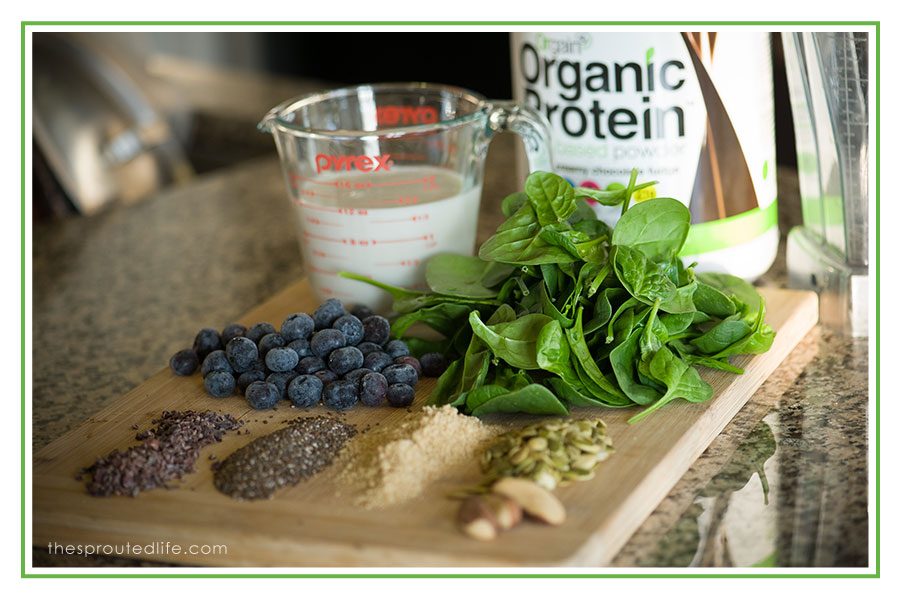
Key ingredients:
Fiber: Flax seed and Chia Seeds
Vitamins, minerals and protein: pumpkin seeds, roasted cocoa nibs, brazil nuts, spinach, unsweetened almond milk and organic chocolate protein powder
Sweetener: blueberries
Because of all the fiber and protein, this smoothie is incredibly filling and satisfying.
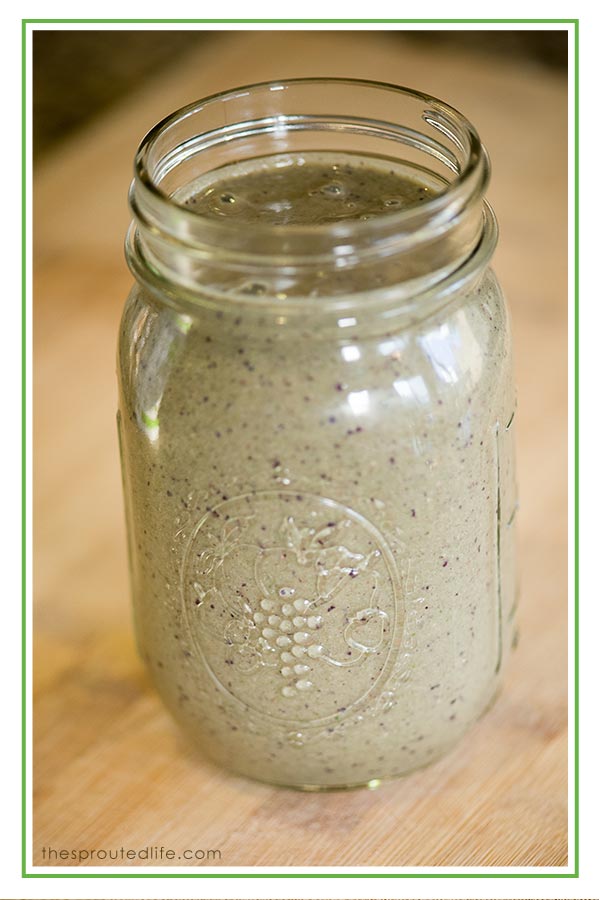
Our Favorite Breakfast Smoothie – Blueberry Chocolate Spinach
Author: Blueberry Chocolate Spinach Smoothie
- 1.5 cups of almond milk
- 2 large handfuls of spinach
- handful of fresh or frozen blueberries
- 3-4 brazil nuts
- 2 Tbsp – 1/4 c. raw pumpkin seeds (I soak and sprout mine first)
- 1Tbsp. chia seeds
- 1 Tbsp. ground flax seed
- 1Tbsp. roasted cocoa nibs
- 2 scoops of orgain organic chocolate protein powder
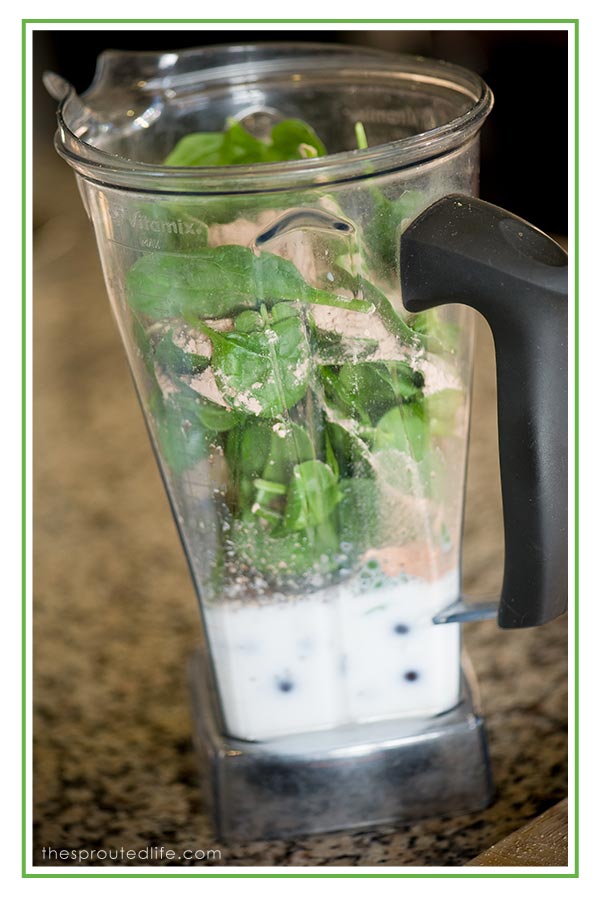
- dump all ingredients in a high speed blender and blend. enjoy!
3.2.1284
May 25, 2012
i am far from being a germ freak. i am one that actually believes that our world is far to sanitary, kids don’t play in the dirt enough and our world’s dependence on “anti-bacterial” products is partially responsible for killing the good bacteria our bodies need.
with that said, the thought of fermenting & culturing my own food sort of freaked me out at first. my first though was something like this: “you want me to sit things out on my counter to spoil and then feed them to my precious children?’” obviously, i have lost that fear, as making yogurt, water kefir and fermented veggies are now regular staples in our household.
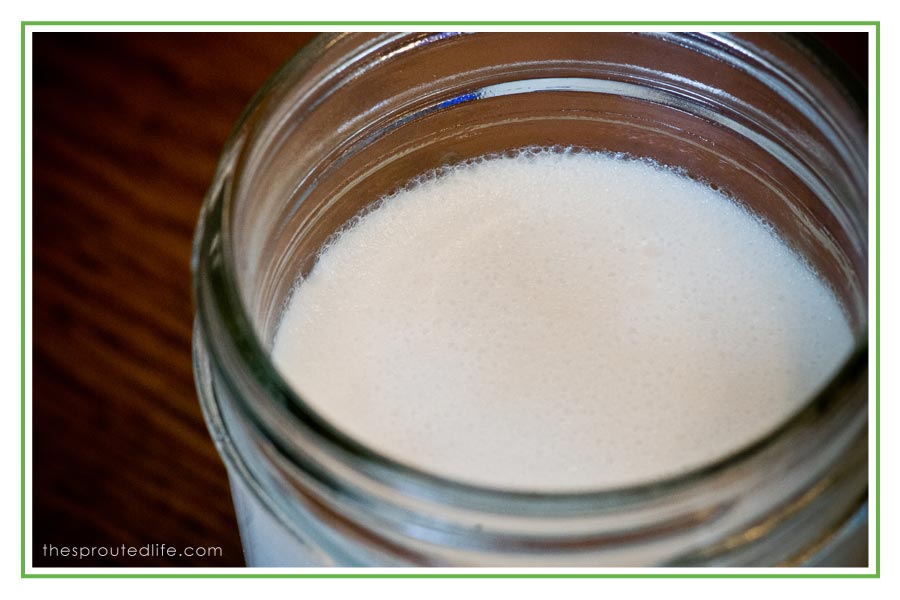
but when i first started, one of my big questions was, “how do you know, when fermenting actually, goes bad?” i read a ton of info on different ways to make yogurt before i began and people would always say it is common sense, obvious signs are really off smell, or visible pink or grey weird surface. curious what that, pink or grey weird surface looks like?” well, i’ll show you.
here is a good yogurt
here is a bad yogurt (with obvious growth on the surface). i know, it’s gross looking.

so what did i do to make this batch go bad? really it was an “i know better than that” mistake. i typically am pretty careful about always sanitizing my jars/tools etc. before creating any fermented food, but this last time as i got my jars ready, i noticed some, stuck on junk in the bottom of one of the jars. so i grabbed a dish sponge (so, not germ free) and wiped the residue out. sure enough, that jar got contaminated with bad bacteria as it cultured. in all of my batches of yogurt, i have only ever had 2 little jars go bad (which is pretty good odds).
happy yogurt making!

May 22, 2012
i first attempted making my own yogurt about 2 years ago, when i was completely dairy free. though we have now reintroduced some dairy into our home, we have still held onto this recipe as one of our weekly favorites. at first, i was pretty intimidated at the thought of making yogurt, but honestly it is really easy and takes very few ingredients. we ferment ours typically about 18 hours, which yields a creamy, slightly sweet, slightly tart final product. if you are used to the sweet store bought yogurts, the tartness of homemade yogurt can be a slight adjustment, but it is so good!
the basic ingredients are coconut milk, honey, vanilla, a probiotic starter and some thickener (i typically use agar-agar).
thoughts on coconut milk:
we typically use native forest organic canned coconut milk. mainly because the cans are bpa free. the downside is that there is guar gum as a stabilizer and i am not a huge fan of it. this week, i am making my own coconut milk from dried organic coconut flakes and i am going to try that in our next batch of yogurt. i will let you know how that turns out!
thoughts on thickener:
we have found that agar-agar is our favorite thickener for the yogurt. i have tried tapioca starch
 , arrowroot
 & guar gum
 and all of them work fine also. i am planning on trying to use plain gelatin
 sometime, but haven’t gotten around to trying it yet.
thoughts on yogurt makers:
i have a little yogurt maker by waring , i got it for about $25 at tuesday morning (a random discount store) we have here. the one thing i did right away was toss all the plastic containers that came with it (i hate bpa) and instead it fits 7 half-pint mason jars perfectly. the nice thing about using a yogurt maker is that it keeps the temperature perfectly consistent at 105 degrees and i can just set the timer and forget about it. a lot of people use their crock-pot, or oven with light on, or excalibur dehydrator
 , so really it is just preference. a yogurt maker is actually not necessary to culture yogurt.
other hints:
- make sure you sterilize jars and utensils before beginning. this is important! (i will show in another post, how to know if your yogurt is bad)
- a good yogurt starter probiotic is gi-prostart , it is dairy free and works well with nut and coconut milks
- a candy thermometer is perfect for making sure you are at the right temperatures (to high of heat will kill your probiotic culture)

| coconut milk yogurt |
#ratingval# from #reviews# reviews
|
Print
|
Recipe Type: breakfast
Author: the sprouted life
slightly tart, slightly sweet coconut milk yogurt
- 3 cans organic coconut milk (full fat)
- 3 Tbsp. raw honey
- 2 tsp. agar- agar
- 1 tsp. vanilla
- 1/8 tsp of probiotic starter (I use GI-Prostart)
- in a saucepan heat coconut milk & honey (stirring constantly)
- bring up to 185 degrees and then whisk in agar-agar or thickener of choice
- remove from heat and add in vanilla
- at this point i pour my mixture into my vita-mix and blend on high to really whip in thickener (but this is not a necessary step)
- allow too cool down to 105 degrees (quicker is better, hint is to set pan in ice water bath)
- as soon as mixture reaches 105 degrees whisk in culture (probiotic starter)
- pour contents into sterilized mason jars (recipe yields 7 half-pint jars)
- place in yogurt maker and set for 12-18 hours (depending on desired tartness)
- when yogurt is done fermenting, it will still be fairly thin until it cools off in the refrigerator
- cap jars and refrigerate (keeps for 7-10 days)
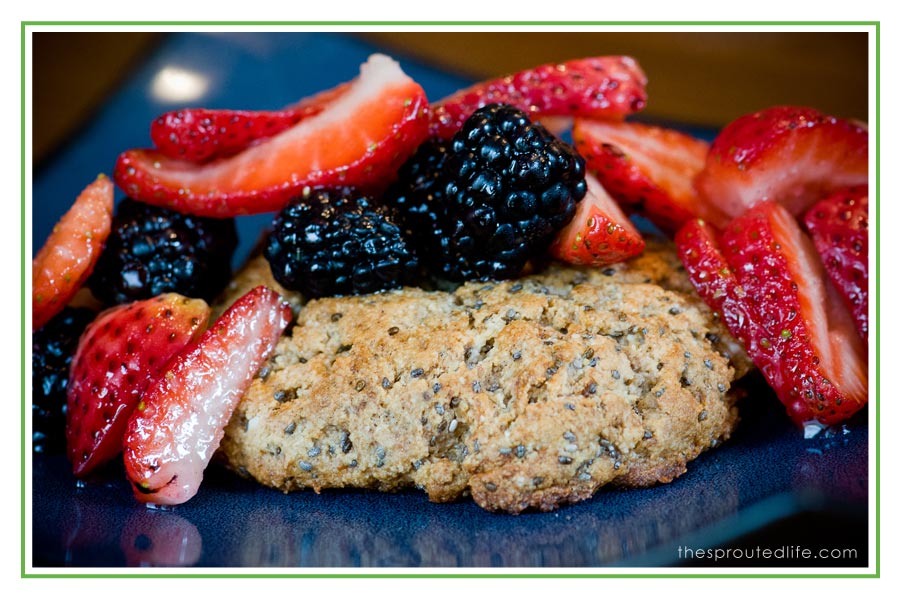
- serve with fresh fruit or granola
2.2.6
shared on: monday mania, slightly indulgent tuesdays, fat tuesday, allergy-free wednesdays & pennywise platter